Environment
Upgrades from a previous version of Retain 3 to a later version
Windows
Situation
Resolution
This article will provide instructions for Windows. Estimated installation time is about 10 - 15 minutes (preparation and installation), depending on the speed of your hardware and Internet.
Preparation (5 - 10 minutes)
1. Create a software repository folder.
This makes it easier for version management. Most customers have a hard time remembering where they downloaded the Retain installation package when they need to access the files again. And, forgetting where they are can also cause disk space to be used as packages get scattered across the server.
If the root disk volume has sufficient disk space, create a folder off the root of the drive called "Software". This is easy to recognize by anyone accessing the server, including tech support. If you don't, find a volume that does and create directory called "software" there.
2. Download Retain into the Software folder.
3. Right click on the downloaded zip file and select "Extract All".
4. Go with the default extraction folder, which should be a subfolder that the extractor creates off of the Software directory. The new subfolder will be named after the zip file, which makes it easy for Support to see what version it is.
Installation (5 minutes)
1. Shut down tomcat.
2. Execute the installation program by double-clicking on RetainInstall.exe.
3. After the first couple of initial screens, it will prompt you with a menu of installation options. Select "This is a NEW INSTALL or I'm upgrading from Retain 3.x".
4. Click on the button, "Install Tomcat", since Tomcat will need to be upgraded starting with Retain 3.5.
a. Follow the prompts - they are self explanatory.
b. Once the Tomcat installation has completed, it prompts you to configure Tomcat. Accept that, as you'll need to make some changes.
c. On the General tab, set the Startup type to "Automatic".
d. On the Java tab, set the Initial memory pool and the Maximum memory pool to the same value. This is a widely accept best practice for Tomcat memory configuration.
For small systems (50 - 200 mailboxes), having 8G RAM on the Retain server should be sufficient. However, mid-size systems should have at least 12G RAM and larger systems should start with at least 16G RAM if not more. You'll need to monitor your Retain system performance and adjust memory accordingly.
As a general rule, you'll want to reserve 4G RAM just for the OS.
If the database is on a separate server from Retain, then give Tomcat the balance of the system's memory.
If the database is on the Retain server, then give Tomcat only half of the remaining memory, leaving the other half for the database. If the database system is MySQL, you will have to manually configure MySQL to take advantage of the memory you wish to give it. On the other hand, MS SQL will take whatever available memory is left to it.
If users do not access Retain or access it very infrequently, favor memory towards the database system. It speeds up archiving. It also affects login speed to the Retain mailbox. If users access Retain often or if there is staff performaing eDiscovery searches within Retain frequently, then favor Tomcat because searches are down through Tomcat. See "Where Data is Stored in Retain" for more information.
e. On the Java tab, set the Stack threads to 256.
f. Click OK to save the changes.
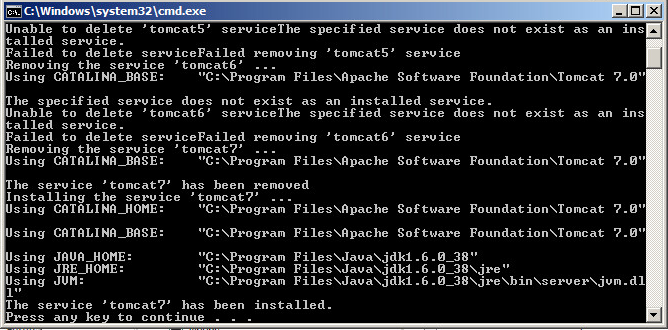
5. You should see a command window open. Press any key to dismiss it.
6. On the Windows taskbar, click on the Retain installation icon to bring the dialog window to the forefront and click on Next.
7. After accepting the License Agreement and confirming the Retain installation path, you'll be given a screen showing Retain modules that you can install. We recommend that you select ALL of them EXCEPT:
- Stubbing server (not recommended unless already in use)
- Message Router (this is for customers using the Retain for Mobile module - and even then - only install if you want the Message Router on the Retain server)
8. Select the option to "Upgrade".
9. Select your web server.
10. Confirm the path to where Tomcat was installed.
11. Go with the default port for Tomcat and install.
12. After the install is done, start Tomcat.
At this point it is recommended to check for appropriate patches.