Environment
Situation
Resolution
If you want to upgrade to GWAVA and move to a new box at the same time, do the following:
1) Install GWAVA 6 appliance. GWAVA 6 Appliance Install Guide.
2) Shut GWAVA 6 down on the new box.Type: rcgwavaman stop
4) On the G6 box, rename the gwavaman.db and identity.xml (located in /opt/beginfinite/gwava/config).5) From the old GWAVA box, copy the gwavaman.db and identity.xml (located in ..gwava/config) and place them on the new box in the same location as in step 4.
6) Start GWAVA 6 back up.Type: rcgwavaman start
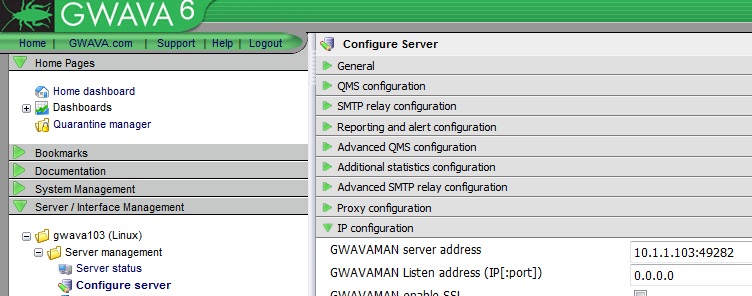
7) Change the 'GWAVAMAN Server Address' by going to GWAVA Management | Server/Interface Managment | Server | Server Management | Configure server | IP configuration | GWAVAMAN Server Address, change the server's IP address to the new IP address.
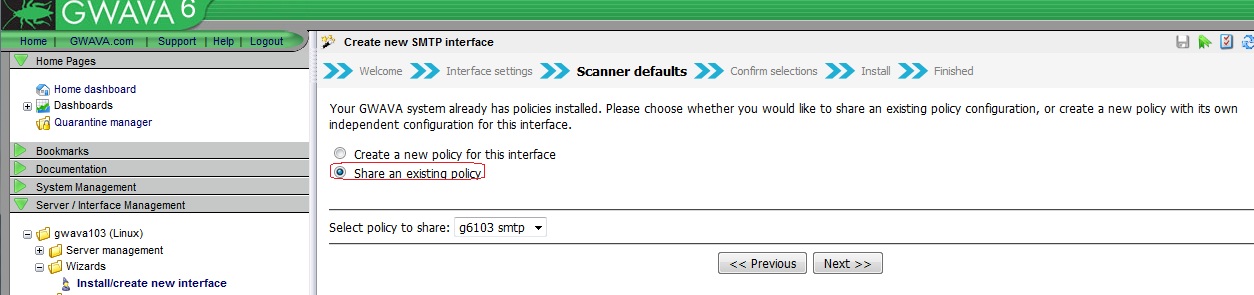
8) Install a SMTP scanner, setting it to share settings with the existing GWIA scanner:
a) Go to GWAVA Management web page | Server/Interface Management | Wizards | Install/create new interface and choose SMTP Interface.
b) Give it a scanner name, and enter in the allowed outbound relay addresses. Click next.
c) Select the option to Share an existing policy and click next.
d) Select Install.
e) Once the policy is installed you should be able to see all of your settings in the proper places.
f) Remove GWIA scanner by doing the following:
1) Go to Server/Interface Management | Server | Manage Interfaces | <scanner name> | Interface uninstall
2) Click on 'Remove Interface'


You should now have GWAVA 6 with a SMTP scanner set up with your settings from the old GWAVA server.